Using the installer
JOSSO EE v2.5 introduces the new Atricore Console v.3.0. This new console is not just a replacement for the old one. It also adds several new features:
- Manage multiple servers from a single point
- Store identity appliance definitions in JSON format on a Git repository
- 100% JavaScript-based (no more Flash!)
- Improved modeling capabilities
The other component is the well known JOSSO Server. With the new console you can manage all your servers from a single access point.
In this document we will review how to install both the server and the console, how to connect the console to the server, and other considerations and tips for those already familiar with JOSSO 2.4.
Environment
You can install JOSSO on any cloud or on-premise environment (Linux or Windows) capable of running a Java Virtual Machine.
There are two main install options: standalone using the JOSSO installer or as a container using a Docker JOSSO image. Both can run in local/virtual or cloud environments like AWS, GCP, Azure.
This guide will get you started using the installer; for container support access the JOSSO container documentation.
TIP
JOSSO 2.5/2.6 is compatible with 2.4 agents, you DO NOT need to upgrade agents already installed in your applications, only the server.
If you are a JOSSO 2.4 user, take a look at the upgrade documentation at upgrading to 2.5 version.
Using the installer
In order to install JOSSO, a Java Development Kit is required (not a JRE). The JDK provides tools that are used by the IAM transforming engine to transform models into running identity appliances. We do support both OpenJDK and Oracle's JDK.
Make sure to have the JAVA_HOME variable properly set before running the installer. In our example, we are using the headless mode:
TIP
"Headless install: run the installer with the -console flag" info
If you are using the GUI installer, you can choose to install the server, the console or both. In case you are using the -console option, you can remove the component you don't need after the install is done, since there is no package selection option supported in headless mode. Just delete the server or console folder if the component is not required in the new install.
Let's take a look at our example. We will ensure that we use the correct java settings and install JOSSO.
    echo $JAVA_HOME
    /usr/lib/jvm/java-8-openjdk
    which java
    /usr/lib/jvm/java-8-openjdk/bin/java
    java -jar josso-ee-2.6.0-4-unix.jar -console
The process will prompt for the install location, we'll refer to it as JOSSO_HOME. These are the two main folders created after completion:
JOSSO_HOME/server: server install locationJOSSO_HOME/console: console install location
The server is the component providing identity services to users and applications. You normally have multiple server instances running in your organization: different environments (prod, qa, dev), cluster nodes, etc. The console allows you to manage multiple servers in a centralized way. You may have multiple console instances as well; it runs as a web service that can be used by any javascript-capable web browser.
         / server 1
console +
         \ server 2
Server layout
The JOSSO_HOME/server folder contains the familiar layout used by all JOSSO 2.x installations. Below is a tree of the most relevant server folders. Let's take a look at what type of content we will find in each one.
server
├── bin
├── data
│    ├── log
│    └─  ...
├── etc
├── extensions
├── features
└─  ...
bin: contains scripts used to start/stop JOSSO, as well as to create Linux startup configurations(rc,systemd)
data/log: the server logs folder, in particular
atricore.logcontains useful information about system status, errors, etc.etc: this folder contains the server configuration. These are server-wide settings like HTTP options or logging settings. You can modify many of these values using the management console
extensions: this folder us used to deploy custom extensions. JOSSO extensions are actually OSGi bundles; you can copy them in this folder following the proper conventions
features: this folder contains configuration files about all installed extensions or plugins; there is a specific file to configure custom extensions. (in JOSSO your custom extensions and all the built-in services are actually OSGi bundles)
Console layout
The JOSSO_HOME/console contains the new console distribution. The relevant folders are:
/bin : scripts to start the console, manage users, configure properties /standalone/log logging folder hosting server.log. Useful for troubleshooting potential console issues
/standalone/data/atricore-wb/.niogit/atricore-idm/parent.git a git repository containing identity appliance definitions
Install the license file
To activate the server simply copy your license file to the server etc folder using the name atricore.lic
This is the location for the license file:
JOSSO_HOME/server/etc/atricore.lic
Starting the Server
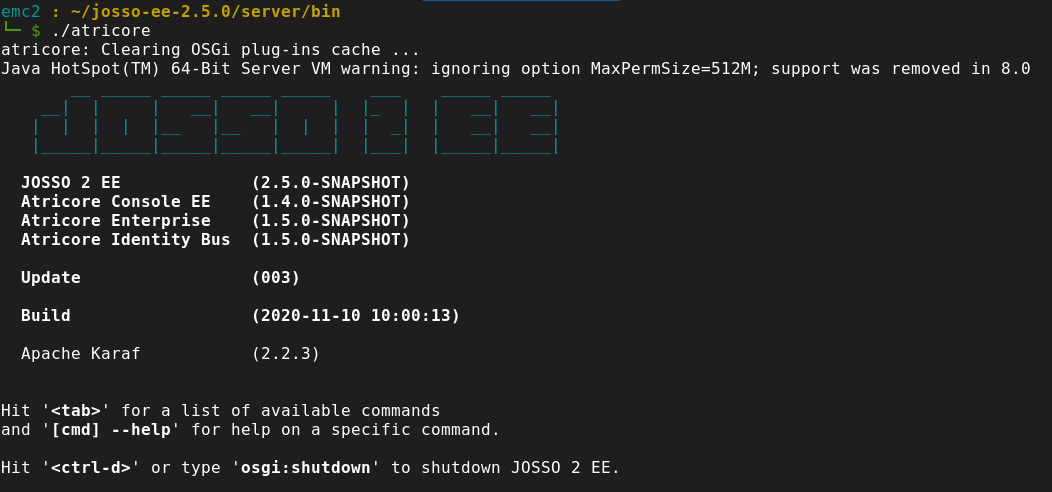
In order to get the server started, you can just go to JOSSO_HOME/server/bin and run the atricore script to run the server as a foreground process.
Use Ctrl-d or type shutdown in JOSSO's command line to stop the server.
If you want you can start the server in background mode by using the start script instead. Use the stop script to shutdown the server.
The bin folder also contains scripts to use as OS service configuration. Windows servers require a different setup.
In the following example we will:
- Start JOSSO
- Run the
listcommand in JOSSO's console (this lists all JOSSO modules/plugins) - Shut down JOSSO
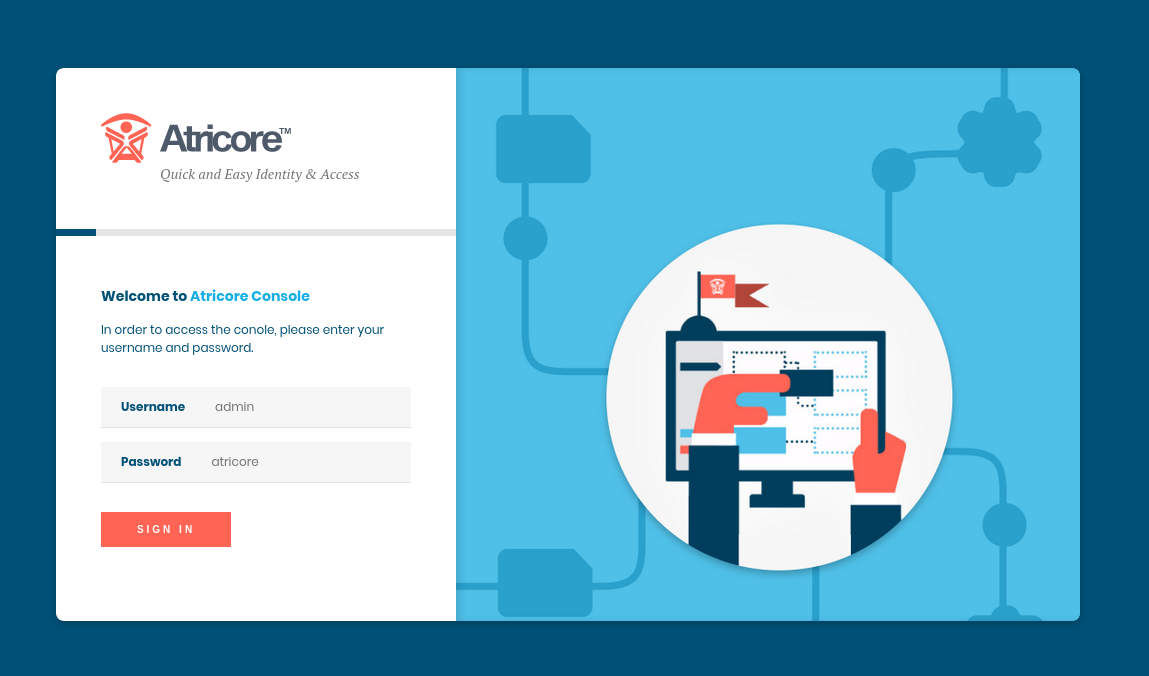
Starting the Console
In order to start the console, access the folder JOSSO_HOME/console/bin and run the standalone.sh or standalone.bat script. Once started, the console is accessible at port 8082: http://localhost:8082 if you started it in your desktop. Default credentials are: admin and password atricore.