Web Console
The console allows you to manage your identity appliances and your JOSSO servers. The first thing you will do is to configure connections to those servers you want to control. Before proceeding with the startup, let’s take a look at the main console features.
Identity Appliance repository
The console has a built-in identity appliance repository based on Git where each appliance is stored as an idmn file in JSON format. You can access the repository (JOSSO_HOME/console/standalone/data/atricore-wb/.niogit/atricore-idm/parent.git) in case direct access is required, however this is not recommended.
The console provides a much better option for managing configurations. You should back up this repository to keep a safe copy of the configured information.
Connected Server
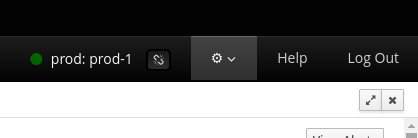
You always use the console connected to a JOSSO server. You can have multiple servers configured, but you connect to one particular instance at a time. The top right menu gives access to the server management section, and provides a menu to select a server to connect.
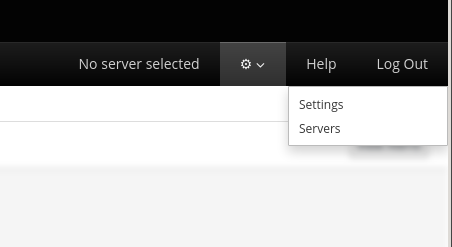
Many appliance-related operations are performed using the connected server. The current server is always displayed in the top bar.
Console Sections
Library
The library section gives you access to your identity appliance definitions, stored in the built-in git repository. You can create and keep track of changes to the models. The library is also used to deploy or retrieve definitions from the console to the connected server.
Lifecycle
The lifecycle section controls the identity appliance state in the connected server. You can start/stop appliances here.
Provisioning
This section allows you to manage users in a remote server identity vault. It replaces the previous console provisioning section.
Making the connection
The first thing you need to do is to connect the console to a JOSSO server. For that, we need to create a server definition, but to do so you will need a set of credentials that the console will use to access the server API endpoint. These credentials are randomly generated when the server is installed, and can be found in the following file. You can modify these credentials if needed by editing the server configuration file. Make sure to restart the server after the change.
To get the credentials you can type the following command in the server console:
karaf@josso-ee>config:list | grep wb
   wb.secret = 7oUHlv(HLT%vxK4L
   wb.clientid = idbus-f2f7244e-bbce-44ca-8b33-f5c0bde339f7
karaf@josso-ee>
As you can see, we provide serveral built-in tools as part of JOSSO, like grep. The other way to get the server credentials is by looking at the contents of the file: $JOSSO_HOME/server/etc/com.atricore.idbus.console.appliance.default.idau.cfg
The other alternative is to access the file containing the credentials:
❯ cat $JOSSO_HOME/server/etc/com.atricore.idbus.console.appliance.default.idau.cfg
#Modified by JOSSO installer
#Wed Oct 20 13:22:45 EDT 2021
wb.secret=7oUHlv(HLT%vxK4L
wb.clientid=idbus-f2f7244e-bbce-44ca-8b33-f5c0bde339f7
TIP
"You can also use SSH to access the server console: ssh -oPort=8101 admin@localhost
Now that we have the credentials, we can access the web console using any web browser: http://localhost:8082 We assume that the console is running in our own desktop, so you may change the provided URL and point to your Console server.
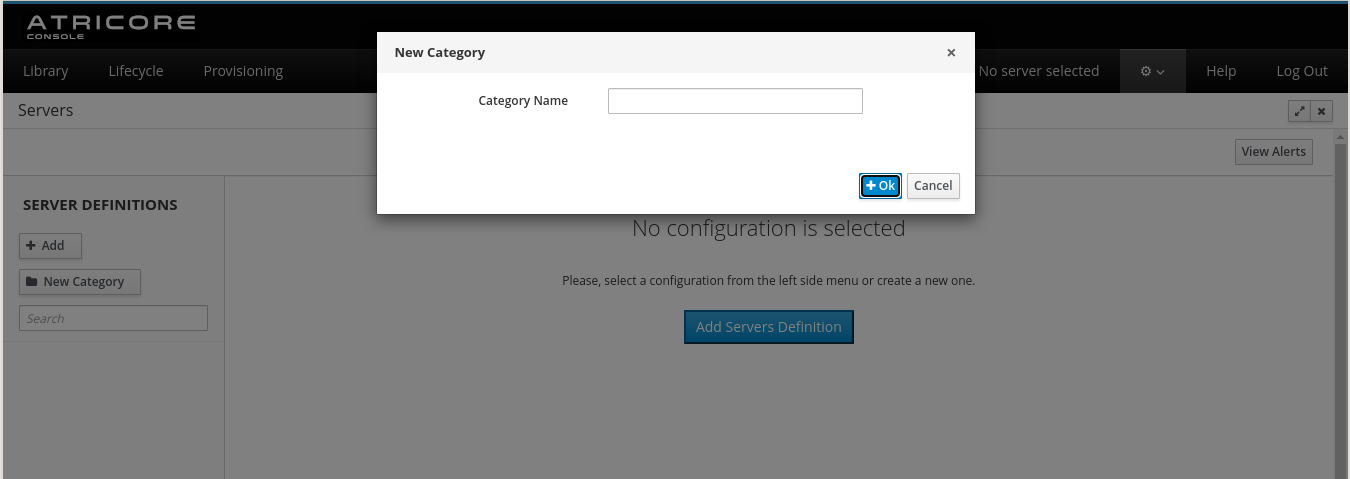
Step 1: add a server category
If this is the first time you've accessed this section, you need to create at least one server category. Server categories are useful to group related servers i.e Production, Staging, etc. Click the New Category button on the left panel and enter the category name.
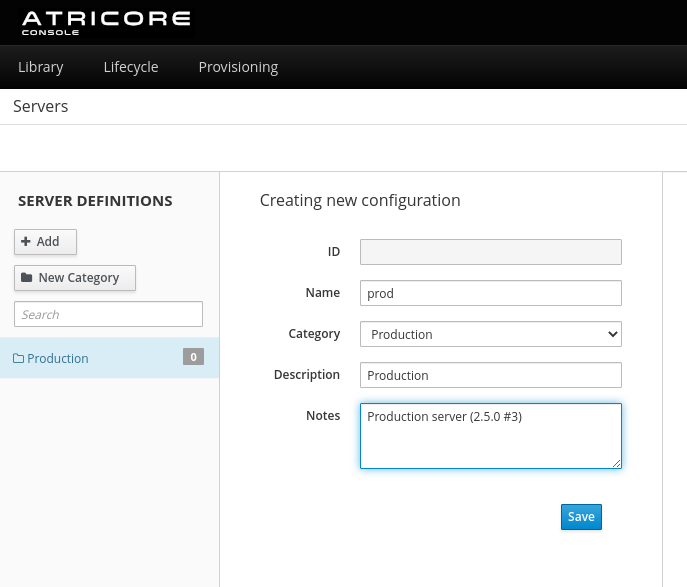
Step 2: add a server definition
Now we can add a new server definition. Each definition is composed of one or more nodes; each node has its own set of properties. When you select a server to connect to, you actually select a node or instance.
Let’s take a look at the different properties:
Name: server name, required unique value
Category: the category this server belongs to
Description: additional information about the server
Notes: details that you want to keep about this particular server
Name: server node name, for instance "prod-1". This is the name that will be visible in the server selection menu. This is a required unique value (no other nodes can have the same name, even in other servers)
Description: information about the node
Endpoint: base URL for the node API, normally this is the server name and port, with protocol: http://10.10.1.5:8081
Client ID: as configured in the server credentials file (com.atricore.idbus.console.appliance.default.idau.cfg)
Secret: as configured in the server credentials file (com.atricore.idbus.console.appliance.default.idau.cfg)
Enabled: if you want this node to be displayed in the servers menu
Auto Connect: if you want the console to automatically connect to the server upon selection
TIP
Username and Password values are no longer required, and will be removed from the UI in the next release. Put any value here.
Username: username to access the server, the default is admin
Password: username to access the server, the default is atricore
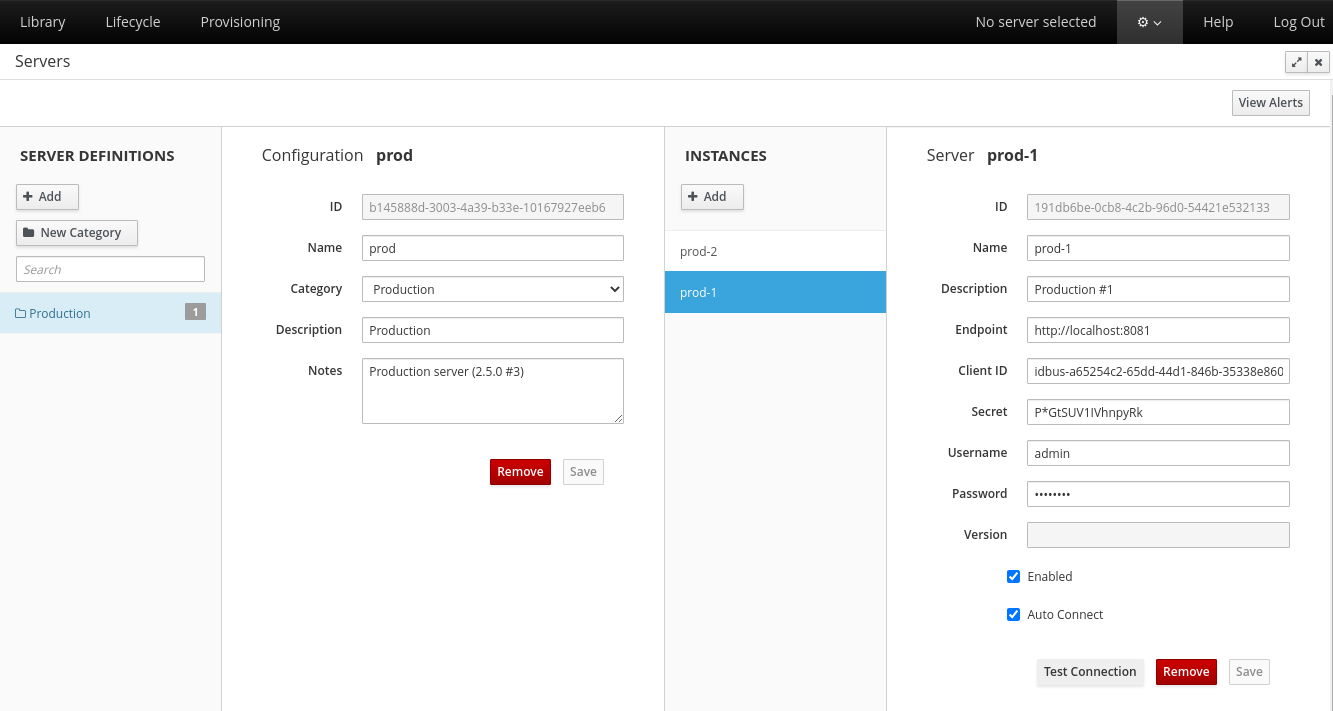
You can click the Test Connection button to verify the provided information once you save the new node.
Step 4: select the new server
Now you can click the servers menu and you will see the added nodes.
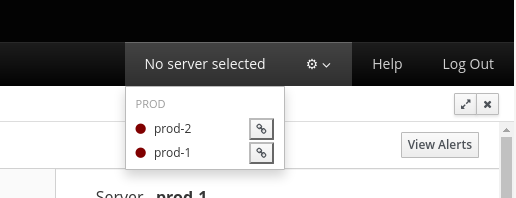
Servers Menu
The servers menu lists all configured servers and the connection state: red disconnected, green connected. You can select a server and, if it is marked as autoconnect, the console will also perform the connection. You can click the chain element to the right of the server to connect/disconnect from it.
Section: Library
The library section displays all the identity appliances found in the local repository, plus those also hosted on the connected server. You can tell if an appliance is local, remote or both by the icon associated with it.
Green pencil: these are locally stored appliances. If they are also in the remote server, the appliance location is the same
Orange pencil: there are are locally and remotely stored versions, but the remote appliance location does not match
Download icon: these are appliances only found in the connected server, you can retrieve them to the console repository

The appliance location is the base URL for all identity endpoints available in a server. Normally this can be used to identify an appliance i.e: http://sso.mycompany.com or http://dev.interna.net. When locations do not match for an appliance having the same name locally and in the remote server, you may need to verify if you are connected to the correct server, or if you need to rename the appliance.
Actions
These are the actions you can perform on an identity appliance in the Library section:
New: create a new identity appliance
Edit: modify an existing definition
Deploy: copy the definition to the connected server. This will override a remote appliance having the same name
Retrieve: copy the definition from the server to the local repository. You can edit it and deploy it later
Import: import a definition in .idmn format
Export: you can download the definition from within the editor (.idmn format)
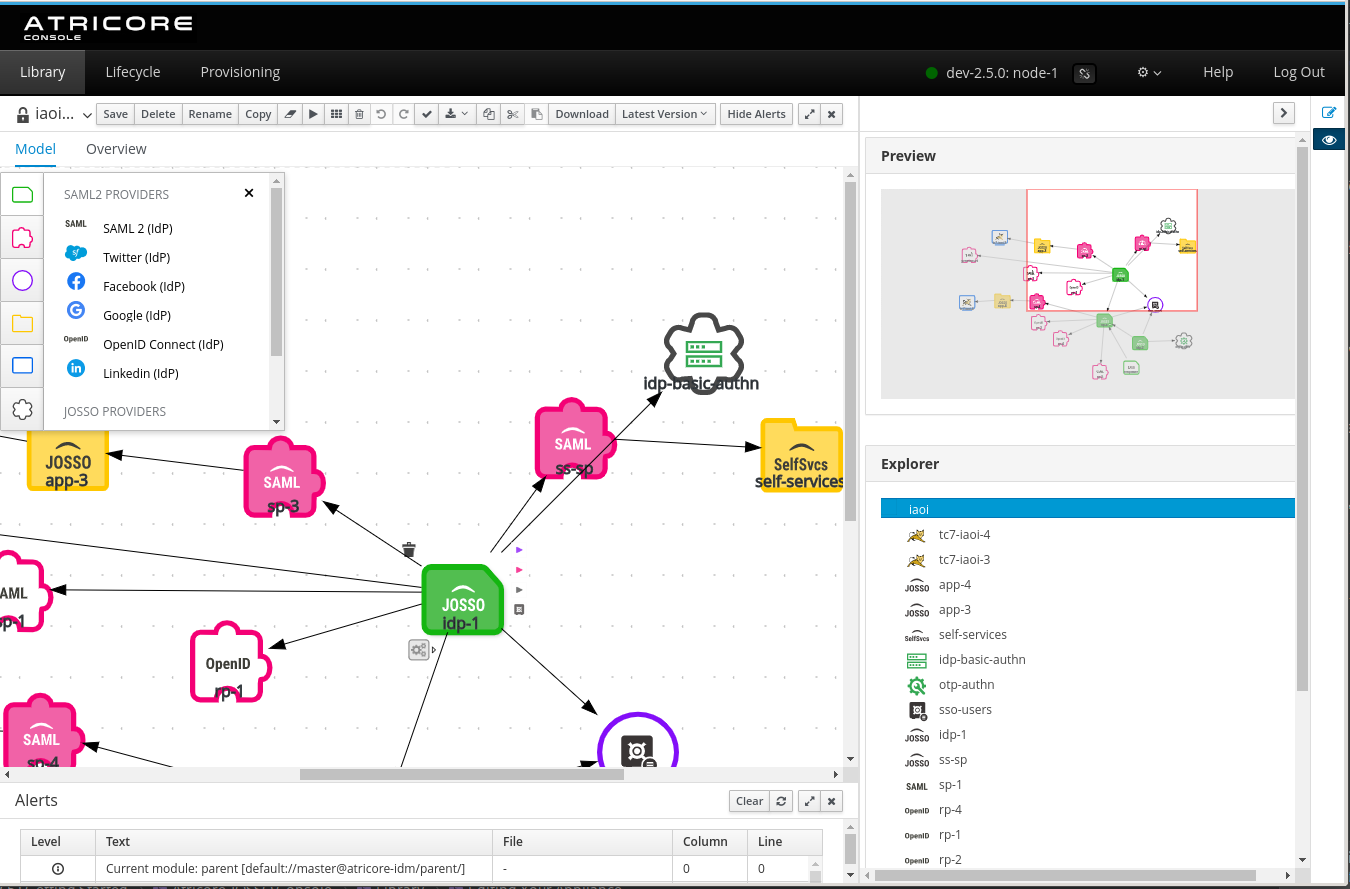
Editing: Model Canvas
Once you open your appliance, you will access the editor. These are the sections you will find:
Element Palette: On the left of the modeling tool, you will find a palette with all the elements available. These are the same provided by the previous console
Property Sheet: On the right of the screen, you can access it by clicking the pencil icon on the top-right icon menu
Diagram Explorer: Also on the right of the screen, you can access it by clicking the eye icon on the top-right icon menu
You will be able to set all the element properties using the Property Sheet section.
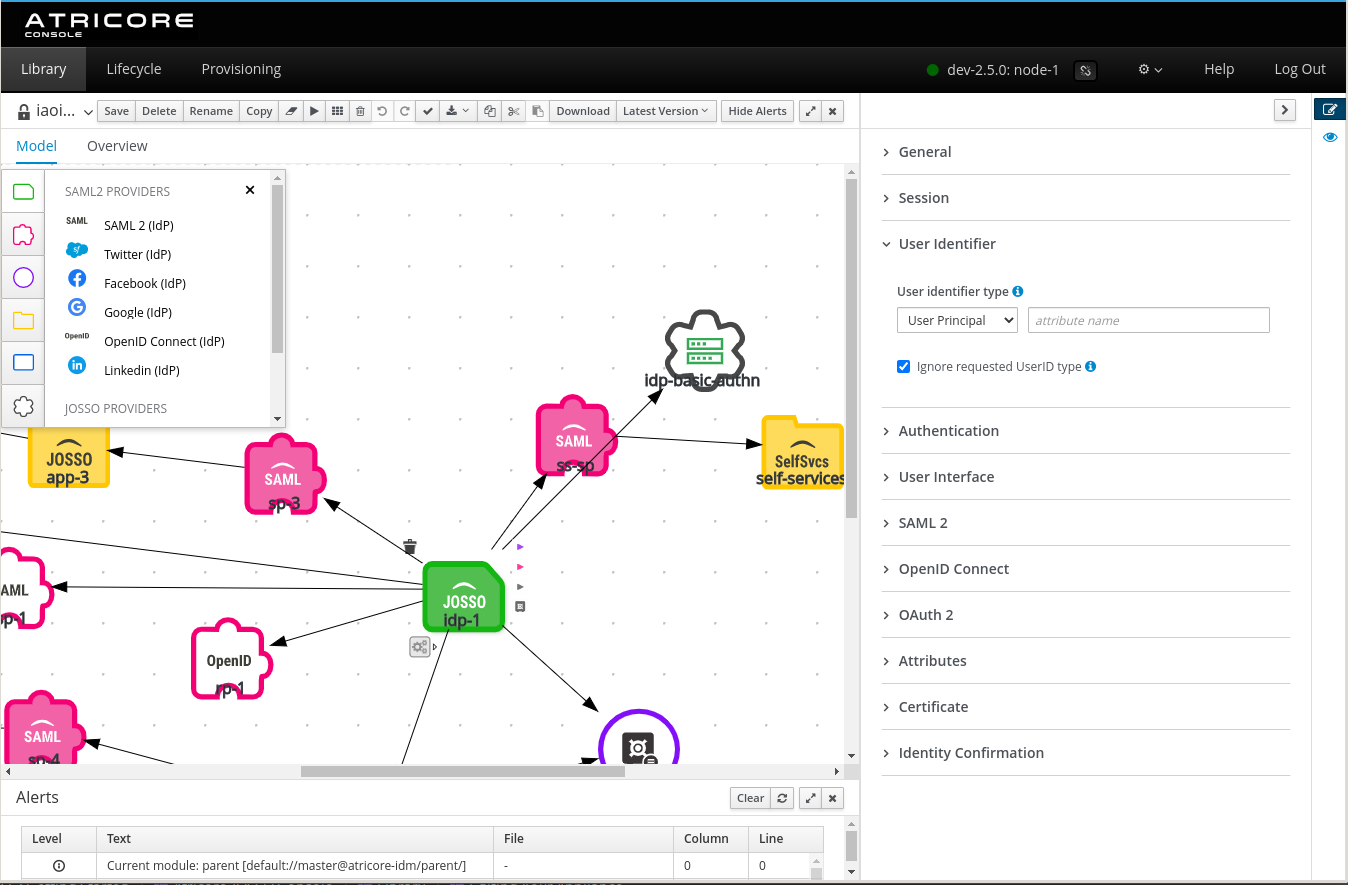
The basic authentication information now has a separate element in this new console version.
Editing: Model Overview
This provides information about the definition in the built-in Git repository.
Section: Lifecycle
This section is used to manage identity appliance lifecycle in the remote server. You can perform actions like stopping or starting an identity appliance, building, etc. Deploying an identity appliance from your local repository to the server is done in the Library section.
The icon specifies if the identity appliance is running or paused.
Actions
These are the actions you can perform on an identity appliance in the Library section:
Build: compile the appliance definition and build the necessary artifacts in the server
Start: starts the compiled version of an identity appliance. This may trigger a build.
Stop: stops a running appliance
Dispose: marks a stopped appliance for deletion
Recover: recovers a disposed appliance
Delete: removes a disposed appliance. This cannot be undone.

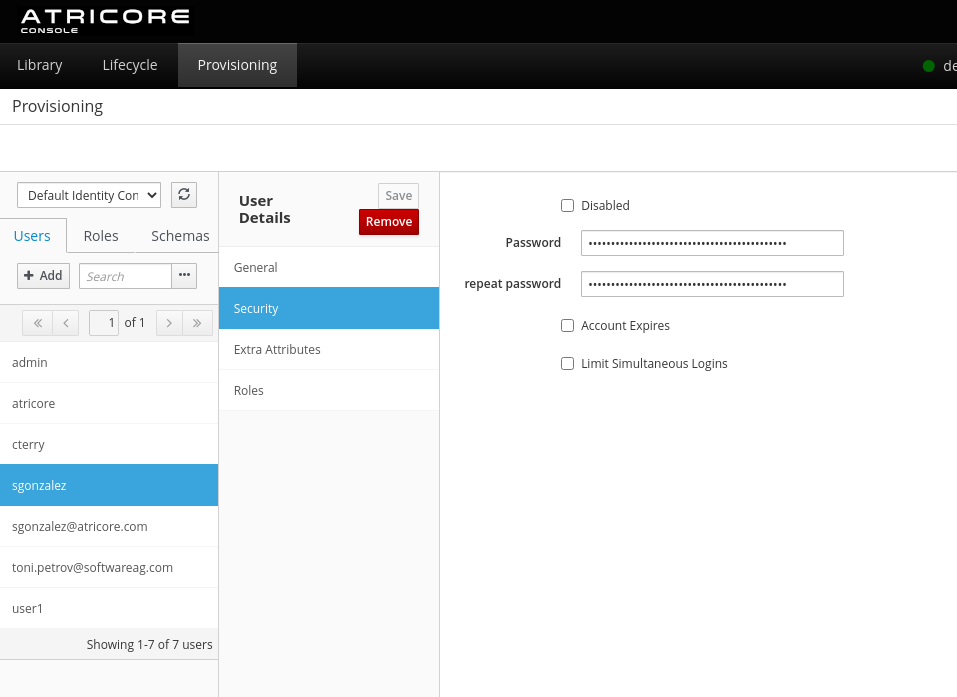
Section : Provisioning
This section allows you to manage users in a remote server identity vault. It replaces the previous console provisioning section.
Some Tips
Activate an execution environment
We will provide a feature to activate execution environments using the console; but for now you can use JOSSO server’s command line interface to do it. Connect to your server using SSH and run the appliance:activate command:
appliance:activate command
karaf@josso-ee>appliance:activate --help
DESCRIPTION
        appliance:activate

        Activate Execution Environment

SYNTAX
        appliance:activate [options] appliance id/name exec-env

ARGUMENTS
        appliance id/name
                Identity Appliance's name or ID
        exec-env
                Execution environment name

OPTIONS
        -r, --replace
                Replace configuration files
        --help
                Display this help message
        -v, --verbose
                Print out additional information
        -f, --force
                Force activation
        -s, --samples
                Activate sample partner application

karaf@josso-ee>appliance:activate -f -v -r ida-1 tc-1
Import old format appliances
You can import appliances in 2.4 format using the server command appliance:import-definition. From there you can retrieve it in the Library section from the remote server, as we described before.
karaf@josso-ee>appliance:import-definition --help
DESCRIPTION
        appliance:import-definition

        Import Identity Appliance definition

SYNTAX
        appliance:import-definition [options]

OPTIONS
        -m, --modify
                Enable Identity Appliance modification
        --help
                Display this help message
        -d, --description
                New Identity Appliance description
        -v, --verbose
                Print out additional information
        -l, --location
                New Identity Appliance location
        -i, --input
                Identity Appliance export file
        -n, --name
                New Identity Appliance name
        -r, --realm
                New Identity Appliance realm

karaf@josso-ee>
Console Users
You should not mistake the users that access JOSSO console, with those admin users that access a JOSSO server; using SSH, for instance.
Console users can be stored in a database, or they can be stored in configuration files (default).
In this example we will add/edit users to configuration files. In this case you can add a user through the add-user.sh script which is in the JOSSO_HOME/console/bin folder. Launch the script:
Select b) option: Application User This user is added to the ApplicationRealm.
Enter the desired username and password.
When prompted, enter the username and password. You will be prompted to confirm the password.
Enter group information, in our case admin If the user belongs to multiple groups, enter a comma-separated list. (We will be releasing role access control in the 2.5.3 version.) Review the information and confirm. If you are satisfied, type yes.
If you enter an existing user, you get options to modify current information:
❯ ./add-user.sh -sc ../standalone/configuration/

What type of user do you wish to add?
 a) Management User (mgmt-users.properties)
 b) Application User (application-users.properties)
(a):
Enter the details of the new user to add.
Using realm 'ApplicationRealm' as discovered from the existing property files.
Username : sgonzalez
Password recommendations are listed below. To modify these restrictions edit the add-user.properties configuration file.
 - The password should be different from the username
 - The password should not be one of the following restricted values {root, admin, administrator}
 - The password should contain at least 8 characters, 1 alphabetic character(s), 1 digit(s), 1 non-alphanumeric symbol(s)
Password :
WFLYDM0101: Password should have at least 1 digit.
Are you sure you want to use the password entered yes/no? yes
Re-enter Password :
What groups do you want this user to belong to? (Please enter a comma separated list, or leave blank for none)[  ]: admin
About to add user 'sgonzalez' for realm 'ApplicationRealm'
Is this correct yes/no? yes
Added user 'sgonzalez' to file '/data/atricore/josso-ee-2.5.3-dev/console/standalone/configuration/application-users.properties'
Added user 'sgonzalez' with groups admin to file '/data/atricore/josso-ee-2.5.3-dev/console/standalone/configuration/application-roles.properties'
Is this new user going to be used for one AS process to connect to another AS process?
e.g. for a slave host controller connecting to the master or for a Remoting connection for server to server EJB calls.
yes/no? no
Adding users in non-interactive mode
You can also add users in non-interactive mode, useful when combining creating servers with Docker, for instance.
Further reading
Configuring JOSSO as an OS service
This only applies to the on-premise installation; docker images automatically start JOSSO when the container starts.
If you want JOSSO to automatically start when the server is started, you need to configure it as an OS service.
For Windows, you can follow this tutorial: [Windows Service setup].(http://docs.atricore.com/josso2/2.4/tutorials/josso-windows-svc-tutorial/html/en-US/JOSSO_Tutorial_Windows_Svc.html)
For UX systems, you get the necessary startup scripts in the $JOSSO2_HOME/bin folder: atricore_rc, atricore.service.
You can now access the Getting Started guide from the console’s Help section.